Friday, January 16, 2015

Silly Voices!

I have a confession: I hate choir rehearsals.  

I have been an instrumentalist my whole life and shocked myself when I decided to apply for an elementary general music job.  I was even more shocked when I got the job!

And then I had to prepare a huge Christmas concert that is traditionally the entire school standing on risers and singing.  

I spent WAY too much of my instructional time teaching the choir music by rote and both the students and I hated it.  I started brainstorming new approaches to the choir concert and came up with two solutions!


1: Transitions.

My 2nd graders are great musicians, but oh so easily distracted.  Transitions in my room were a nightmare.  Even if I was giving directions, or immediately switched to sing a new song, all they saw the split second opportunity where they could start a conversation with their neighbor or poke the person next to them or wiggle away from their seat.  Then I saw the Big Bang Theory one night when Sheldon and Penny were making Penny Blossom hair barrettes and singing their "rhythmic work song to increase productivity."  So I tried it with my little guys and it worked!  As soon as I needed to transition to a new song, I'd start us all off in singing our choir music while they put away instruments or moved to a new spot in the room. Very quickly their ability to move from one activity to the next magically changed and suddenly I didn't need to allot time to work on our choir songs!  Works great with 2nd and 3rd graders who can't handle the standing still of choir rehearsal!

2: Silly Voice Cards!
My little guys in 1st and Kinder needed more rep than transition time could give them.  They knew the tune real well but the words didn't stick enough.  Running lyrics with them would have been impossible for anymore than 2 minutes.  Then I remembered the millions of times I had to redirect silly voices back into singing voices.  Why not give them a chance to USE their silly voices for good!  I printed up a set of Silly Voice Cards on 3x5 cards and practiced my "Pick a card, any card!"  (of course they didn't get the humor, but I chuckled every time I said it!)

http://www.teacherspayteachers.com/Product/Silly-Voices-Cards-1568729I couldn't believe my eyes when I looked at the clock and realized we spend a half hour saying our choir lyrics over and over and over in pirate voices, teenage voices, angry voices, giggly voices, grandparent voices, underwater voices and cowboy voices!  Not only was each student excited to get to chose a card for the class, they were all excited to see what silly voice they were going to use!

You can get a set of Silly Voice Cards in my TPT store!  Click on the alien link!

Sunday, January 11, 2015

Favorite Things Linky!

http://teachingtrio.blogspot.com/2015/01/favorite-things-linky-classroom.html

I'm new to the Linky thing, but thrilled to join tons of great teachers and bloggers! Teaching Trio is hosting a Linky Party this month-click on the image above to see what more bloggers love!


Here's a link to my Jump Bands DIY blog post to make your own for under $10 a set!
 

Friday, January 9, 2015

Jump Bands DIY


I saw this video of students with Mrs. Kristin Lukow jumping to the beats a few months ago and I knew it was something I wanted to do with my kiddos too!  


My husband was leaning over my shoulder watching one night and immediately recognized it as a form of a Filipino dance, Tinikling! 


I immediately started researching to get myself a set of Jump Bands too...but stopped suddenly when I saw how expensive the brand name elastics were!  But growing up with a mother who sewed all my clothes and costumes, I knew we could make a set ourselves.  
http://www.amazon.com/Dritz-9518-Red-Elastic-3-Yard-1-Inch/dp/B007WDTUR2/ref=sr_1_1?ie=UTF8&qid=1420840579&sr=8-1&keywords=elastic+red

I headed over to Amazon (my go-to for almost everything) and found the bright colored elastics for $4.00/3 yds. I ordered 2 reds, 2 blues, 2 greens, and 2 purples.  


DIY Jump Band Instructions

Materials: 
6 yds of 1 inch elastic in each color (2 sets of 3yds is great)
Matching thread
Fray Check 

Finished size: Each band will be 7ft long with a foot hole on each side.

Steps: 

1. Cut elastic into 3yd pieces
2. Measure and mark 1 foot from the end on both sides
3. Fold end into mark and sew to create foot hole.
       {tip: this is the only seam that will need to hold the tension of students jumping/stretching the bands.  I sewed a box approximately 1 inch long using a thick zigzag stitch for extra support.  You might also choose to sew a box with an X in it if doing a regular zigzag stitch.}


4.   Sew foot holes on both sides of the elastic and repeat for second band.  
5.  Apply fray check to end pieces and up the side of the seam to delay any fraying 

My sewing machine was a little finicky with the elastic but my mother's machine sewed nicely.  I had some problems with skipping stitches and not picking up the threads but that was because I was doing a fancy zigzag. 

Well my homemade DIY Jump Bands have been through 4 classes and lots of feet and so far so good!  The foot holes are holding up nicely and we can fit 3 or 4 jumpers at a time! I spent a little over $40 and made 4 sets!

Good luck with yours!


edit:  I just finished 6 weeks of intense Jumping and my bands are still doing great!  My only comment would be to make the original bands about a foot shorter.  I knew they would stretch, but didn't take that into account when I thought about the space in my room.  It's important that the bands are taught when jumping and my room is a little too short for some formations my students wanted to do.


Saturday, December 27, 2014

Liebster Award


I didn't know what it was, but apparently I was nominated for a Liebster Award by Rachel from Music with Mrs. Tanenblatt!  Thanks so much, Rachel!
The Liebster Award was created to highlight blogs with growing audiences. 

The rules for receiving this award are:

  1. In your post link back to the blogger who nominated you as a thank you and a 'shout out'.
  2. Answer the questions that the tagger set for you plus create 11 questions for the people you've tagged to answer. (The questions I have answered please)
  3. Nominate 11 people (Blogs with less than 200 followers) and link them in your post. 
  4. Let your nominees know and provide them with a link back to your post (so they can see the rules)
  5. No nominating the person who nominated you, however send them a thank you :)
1. Why and how long ago did you start blogging?
I had a xanga like most high schoolers, if you can call that a blog, about 10 years ago.  After spending countless hours reading other music teacher blogs, I felt I had some information to give back as well and started a blog this past summer!

2. What one word sums up the heart of your blog and why?
Technology.  I love using tech in my music classroom and as the technology coordinator of my school, I'm the first to test drive any new tech in our building and am always trying to make it easy for my fellow teachers to incorporate in their classroom as well.  I have a few blog posts purely about tech as guides for other teachers in my building.

3. Is there something you learned late in your blogging journey you wished you knew before?
Pace yourself!  I had so many things I wanted to post back in July that I was posting 3 or 4 pages a week.  Now that I'm in the hubbub of school, I'm scrounging for time to post.

4. What is your favorite past time other than blogging?
I like to crochet.  It keeps my hands busy.  My husband and I are TV addicts too.

5. How many hours per week do you dedicate to your blog/TpT?
I'm addicted to TPT.  It's too easy!  I love creative digital design and any new idea I get for a product consumes me until it's done.  Maybe 4-5 hours a week.

6. What category of blog posts do you enjoy the most?
I appreciate DIY posts that save money!  I have a decent budget at my school but I feel bad constantly buying new things so I love to make them! 

7. Where does your blog inspiration come from?

My kids!  They dictate the course we take in class whether it be lots of movement or more sit down games or composition or group projects.  When we come up with something good, I can't wait to share with others!

8. Which post that you've written are you most proud of?
I love my QR Interactive Bulletin Board Post.  It isn't the most viewed post of mine, but I am very proud of my bulletin board at school and being able to showcase student work of what we REALLY do in music class. (not just what we sing at a concert).  Whenever there are tours of the school by potential families, they get a chance to scan QR codes and see inside my classroom.  I love it!
9. Is there any post you have been planning to do, but have been postponing it for a while now?
I've got a new one coming out about Jump Bands DYI!  I spent my Christmas sewing with my mother!

10. What's your favorite aspect of blogging?
Helping others in their classrooms as well.  I've been blessed to find a lot of blogs to help me out and inspire me to inspire my kids and I want to share the wealth!
11. Which recipe, project, or idea on my blog would you be most likely to try yourself?
Just heard about your stretchy bands!  Another project for my mother and I to sew and help the little kiddos explore music!

Here are my nominees!
Shelly of Pitch Hill
Michelle of Music with Miss W
Allison of Mallets and Music

Thursday, November 6, 2014

Prezi for iPad!

The art teacher approached me about a new idea for "when you're done time" that can still be meaningful.  She wants the students to be able to see prominent examples of artwork (that she chooses) and choose a short project to do in relation to it.  Her immediate thought was to make a Prezi with artwork since that's what she's familiar with.

Than the questions became can the students access Prezi on their iPads, and even deeper, can we direct them there via QR code???

The answers?  Yes and YES!

Prezi Viewer is a free app (check it out here!) that lets you view any public Prezi on your iPad.  There is also a create/edit your Prezi app but for our purposes, we didn't want students to edit, simply view.

Once you make your own Prezi on your computer, make sure the settings are for Public Viewing.  Then copy the link and head over to a QR generator and print!


Here's a QR code for my Concert Etiquette Prezi!

Wednesday, October 8, 2014

A Listening Walk

A few years ago, I learned about the book The Listening Walk by Paul Showers.  I love it for my little guys to open their ears to the sounds they hear all day everyday!  We read the story together and then go on a Listening Walk of our own!

On a Listening Walk I do not talk.

We echo that phrase over and over and over again with hand motions (starting to integrate Whole Brain Teaching into my daily practices!) to try to get these 4 and 5 year olds to close their mouths and open their ears.  Typically it works!

Before heading outside, we talk about some sounds we might hear outside.  Birds, leaves, wind, crickets, cars, etc.  I try to direct their attention so they have something to listen out for.

Outside I take them all around the playground and close to the wooded area around us.  Every so often I direct their attention silently to the sky for a bird, or an airplane, or to the leaves on the trees.

With Kindergarten, we head inside as well and listen to the sounds around school: keyboard clicking, doors closing, teachers vs. student voices, etc.  

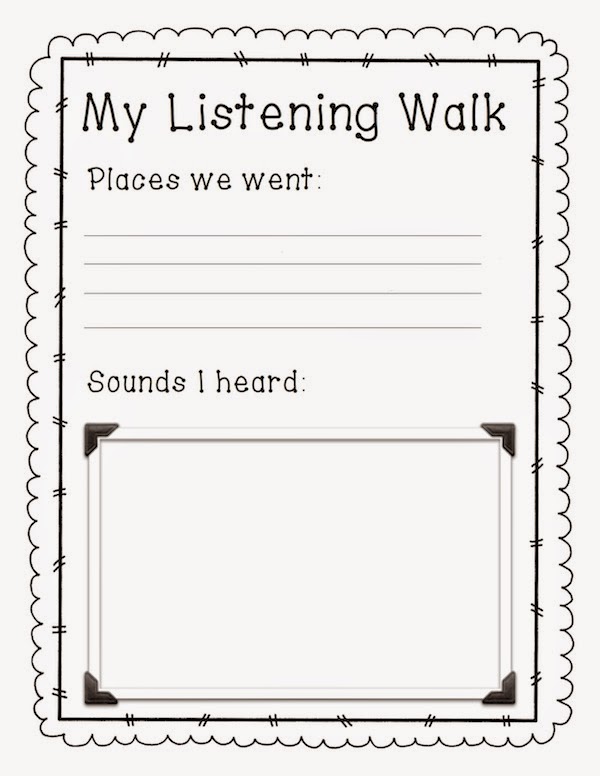
In First Grade this year, I decided to make up a coloring sheet as an activity after our walk.  I bring out crayons and after our walk around the playground, they get the chance to reflect and draw a picture of some sounds their heard.

http://www.teacherspayteachers.com/Product/Listening-Walk-Worksheet-1488704

You can find a link to download My Listening Walk worksheet FREE on my Teachers Pay Teachers store!


Thursday, September 11, 2014

Music Notation Bingo

As a review of rhythm notation, I always play BINGO with my kiddos!  I made a SMARTboard presentation during my first year of teaching and print/laminated boards.


Now that I'm older and wiser (and with iPads), I put the bingo boards in Dropbox instead and have the images saved to the iPads.  Typically, we use a Whiteboard App to cross off symbols.  

After playing BINGO many times, I've noticed the Whiteboard App (FREE) I was using had too many ads and tons of pop ups that distracted my kids.  Today, we used the newly updated EduCreations instead and it worked much more smoothly! 

Here is a link to my TPT store where you can get Music BINGO for your classroom!  

**NO SMARTBOARD REQUIRED!**

This file requires SMART Notebook, SMART Express, or SMART Notebook Interactive Viewer.  SMART Express is a free online program and SMART Notebook Interactive Viewer is a free download.

Check out the SMART website for more information.
http://smarttech.com/Support/Browse+Support/Download+Software