

In my last post, I explained how to take a SMART Board activity and put it on the iPads so more students can be engaged at the same time. This post will explain how to build an Explain Everything presentation. If you missed that post, you can find it here. Turn an iPad into a Smartboard!
So, if you haven't downloaded the app yet, head over to the App Store and pick up a copy. It's totally worth the $2.99.
When you open the app, it will take you to the Home Screen. Press the + button in the top left and select a color template.


Some
of these are self explanatory. Drawling tool, Writing, Undo... But
one nice thing to remember, this is an App on an iPad! Which means you can use
gestures to make objects bigger or smaller (pinching or stretching
fingers), move things around, and spin things in circles.
Couple tools that need explaining: Add. When you press the add tool, it opens up a world of possibilities.
Add an existing photo/video (from your camera roll)
Add a file from Dropbox, Evernote, Google Drive, etc.
Add a new browser window (to annotate on top of a website!!)
Take a NEW picture
Take a NEW video
Add an existing sound

The bottom menu also has some useful tools.
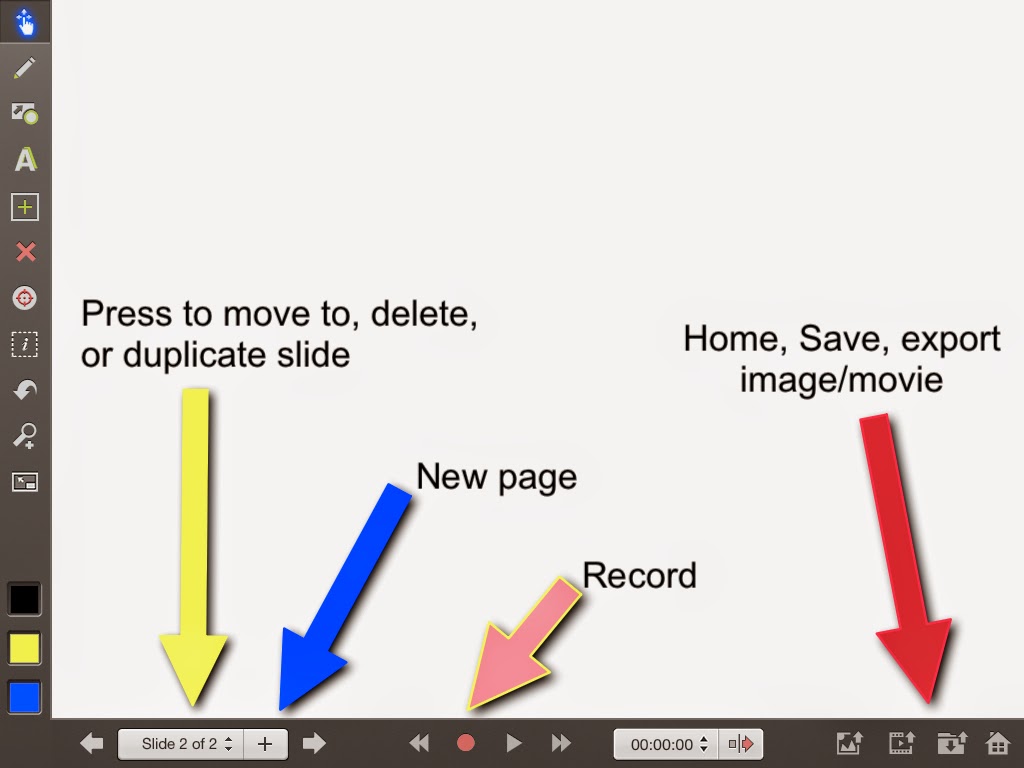
Now let's get back to building our EE presentation to pair with the SMART Board activity. I'm going to skip past building the SB activity and pretend you already have your images saved in Dropbox. If you have no idea what I mean, head back to the previous post about Cherie Herring.
On our blank EE presentation, you want to Add an Existing Photo from Dropbox. If you haven't signed into your Dropbox yet, it'll help you do that. Select the image you want to be your first page (same first page as SB activity).
Resize the image to fill the page (using your pinching/stretching gestures) then press DONE (top right). If you wanted to crop or rotate the image, that was the best time.


Since my SB activity only asked them to draw, that was all I had to set up! I got a new page, and did the same to my second page and so on until I finished.
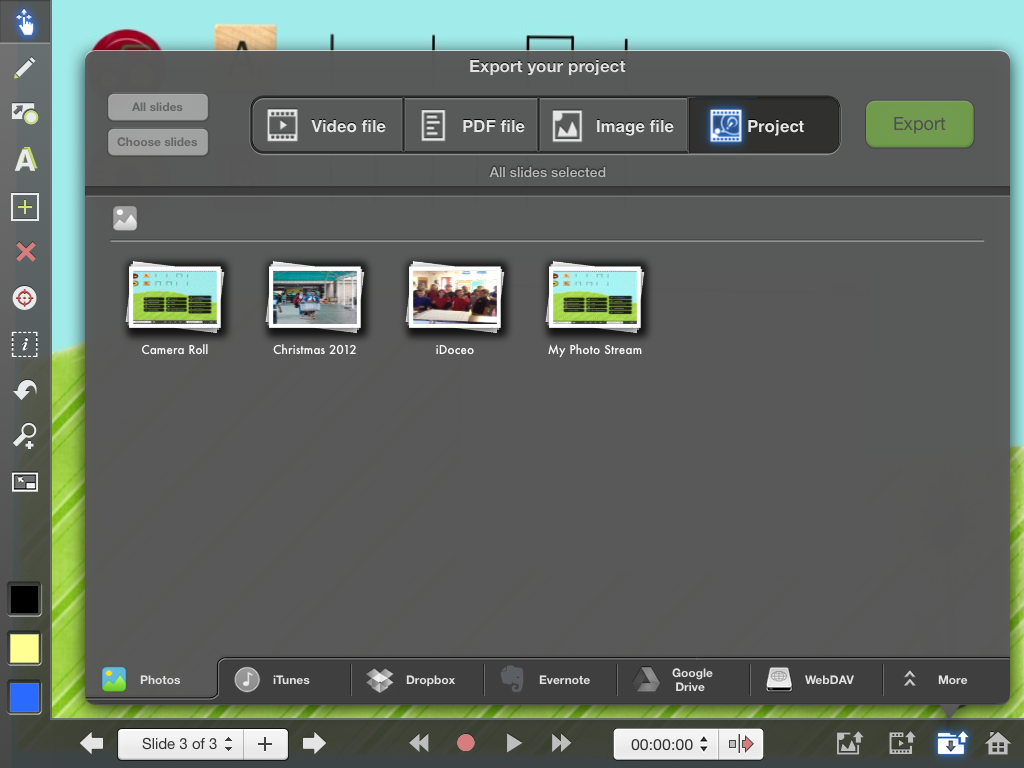
All done! Click the save button and enter a project name. Export to Dropbox but be sure to export as a Project! The end goal is that the students open the project using Explain Everything on their own iPads.
I love Explain Everything. SOO many ways to use this app!
edit://
I linked up with Mrs. Beattie's Classroom linky party all about Smartboard Resources! Check out other posts here:

Such a great post! I'm definitely getting it...thanks for the awesome blog posts!
ReplyDelete